
Just a quick post today...
Amy finally got everything set up to her liking and took pictures of all of the pens turned so far. I've managed to get the gallery set up to my liking and have posted all of said pictures there. Here's a quick link for those interested.
A bit of background is in order, I believe. And yes, I know most of you who know me are probably groaning right now, fully aware that this will end up being a entry of epic length.
I have only just recently returned to the shop after an extended absence. Being the way that I am, I fully believed that I could just jump back into woodworking and be able to work at the same level I had two years ago, such as it may have been. Well, I was mistaken. It started innocently enough... I was trying to build coin banks using old post office box doors. Seemed easy enough, but I decided that I needed a decent belt sander to do the job right as no matter how I try, I can never get my joints to line up perfectly. I figured a belt sander would help me clean up dovetails without rounding things over as I tend to do with my orbital sander.
Of course, there's only one place that I usually go for a tool of that sort...Woodcraft, of course!
Long story not-so-long, I picked up my sander on Veteran's Day. Woodcraft does this neat thing every year where they encourage folks who are handy with a lathe and gouges to turn pens to send to the troops. If you happen to wander in on Veteran's Day, they'll even hook you up with a pen kit, the blank and let you use their lathes and tools to turn a pen in the store. If you've never turned anything on the lathe before they'll walk you through it and give pointers.
Now, I had turned some small bowls on the lathe, a couple of tops, and generally made square pieces of wood into smaller roundish pieces of wood, but had never turned a pen. It looked simple enough, but I decided to watch for a bit to see how the pros did it. I finally worked up the courage to give it a shot and was almost immediately hooked. Of course, after reading a couple books on turning pens and looking at some examples of what the finished product should look like, I feel sorry for the poor guy who gets stuck with my block of wood with a pen sticking out of it.
Anyway, I've turned three pens since. It turns out (no pun intended!) that it's the perfect after-work type project as I can usually knock out at least one pen in an evening, so it satisfies that urge to ruin wood in the hours between commuting and sleeping. Here's a small pic of my first attempts:

The one on the left (I believe) is made from cocobolo, the middle from cherry and the right is maple burl that I have finally worked up the nerve to use. Not exactly museum showpieces, but I'm slowly getting better at it and having a great time doing it. It's nice to be doing something somewhat productive with my spare time again.
Yes, I know it has been a while since I have posted anything. To be honest, I haven't spent a lot of time in the shop recently...until now. As such, I thought I would post a little blurb about and some pics of what I have been up to in the past few weeks.
Those who know me know I am a huge fan of immediate gratification. I don't have a lot of time during the week to enjoy making stacks of wood into smaller pieces of wood, but I do gain a serious feeling of relaxation when I do so. However, I am also not the sort of person who likes to start a project and pick it up again the next day. So, to satisfy my need to ruin wood, relax, and have "one night" projects, I have now contracted the disease that is woodturning.
With that in mind, here are a couple of my first pieces. First up is a bowl I turned from a piece of ... well ... pallet wood. I call it pallet wood because I have no earthly idea what exactly it is. It is a piece of a pallet that the generator we had installed at work came on. It was rather thick stock, so I thought it would be a good batch of wood to butcher while I learned how to turn.

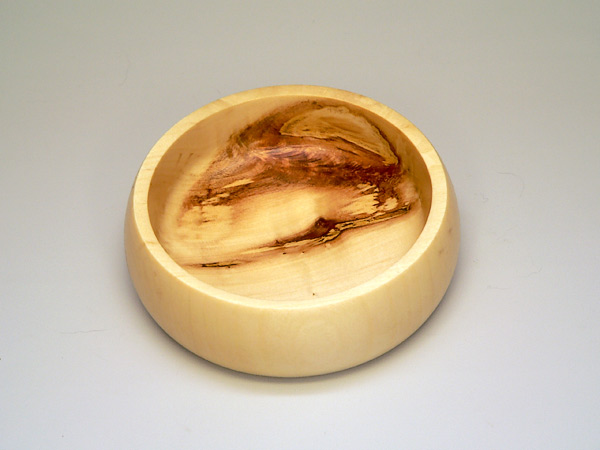
I was a bit worried about using this particular blank as I was afraid that the knot would blow out and bad things would happen. I was pleasantly surprised by how it turned out though.
Next up is a piece that I made from some scrap maple and walnut. I had some 5" square x 3/4" pieces that I was going to use to make something else, but decided to glue them together into a block and see what I could get out of it. Here's what I got out of it...
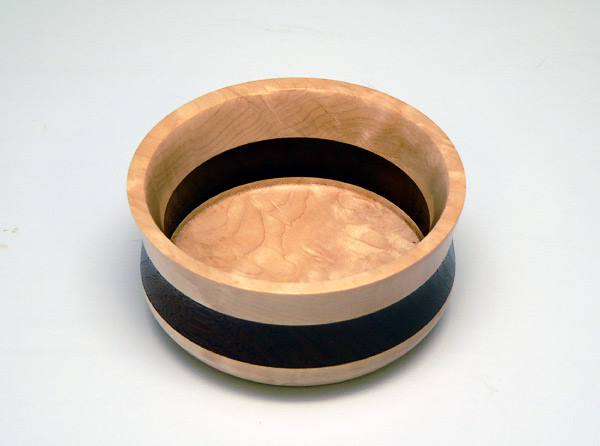
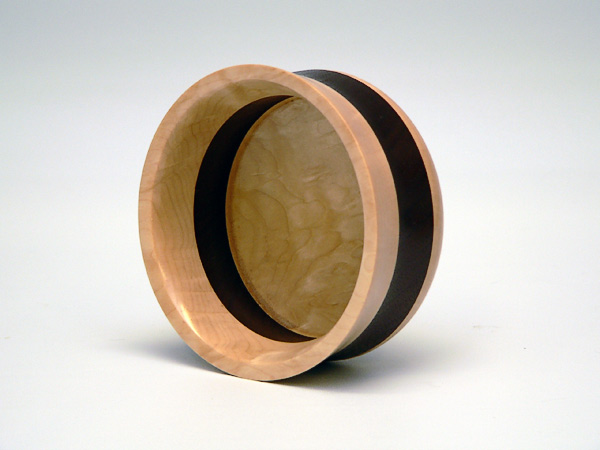
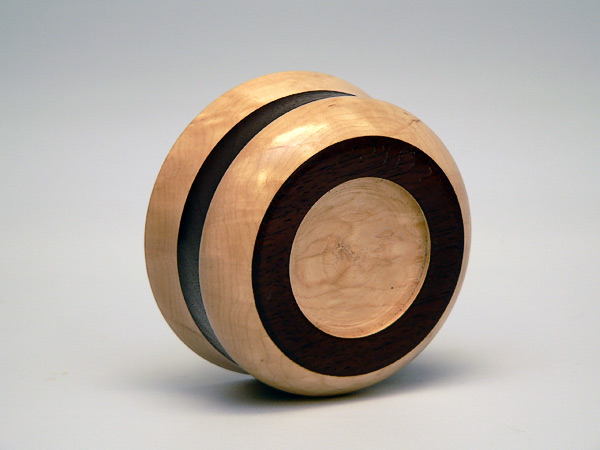
A slightly funny story, and one to reaffirm the need for a face mask when turning...this bowl was originally four pieces of wood thick, or about 3" tall. I attached the bowl to a faceplate and shaped the outside of it. Then I cut a "hole" in the bottom of the bowl so that I could put the bowl in my chuck and hollow out the inside. Well, I guess my piece of walnut didn't like being in the chuck as as soon as I put gouge to wood the bottom of the bowl blew up. The bowl went flying and rolled across the shop. So I put it back on the faceplate, fixed the blowout and chucked it up again. Blam! Blew out on me again. I finally gave up and cut all the walnut away except for the small ring at the bottom of the bowl. I thought it looked kinda cool like that though.
So, anyway, that's what I've been up to. Yes, there were plenty of other bowl-like things that came before these. No, none of them are worth posting...unless I decide to do the "outtakes" section of the website. But needless to say, making square wood round is very addicting...and very satisfying. Now all I need is a chainsaw :)