
Well, after the debacle with the electrician, we decided to take matters into our own hands.
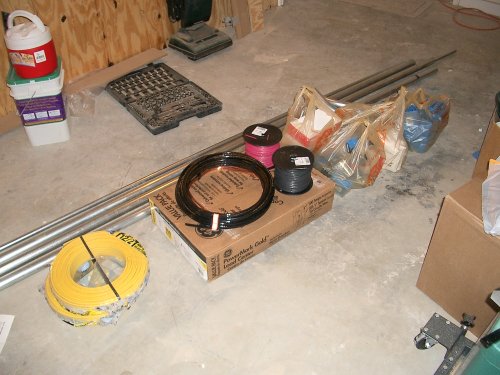
Anyone want to take a gander at this pile and guess what's in store for this weekend?
A couple of my friends from work will be joining me in what I hope will not turn into an electrocution party. It should be interesting, to say the least.
It should be noted, however, that with all of the materials shown here, I now have a little over $410 into the project. I forgot a couple of small items, but I don't expect the total tab will get much over $500...a little less than half of what I was quoted by the electrician just to run the subpanel! Granted, that doesn't take into account the food and beverages required for everyone...
Just a quick post to vent (no pun intended...you'll understand soon).
Finally got the new area of the shop cleaned up to the point that I was going to spend tomorrow moving stuff into it. Had big plans to start running the ducting for the dust collector...all that just went to hell.
Now, understand, we live in Georgia and its the end of July. In other words, its hot. Really freakin' hot.
Went out to the shop today only to find that our air conditioner, the most important tool in the shop during the months that don't have "R"s in them (think about it), is DOA. Needless to say, it's a bit toasty in the shop.
So, there go the plans for tomorrow. I have a feeling I'll spend part of the day trying to get the stupid thing fixed (it's still under warranty) and the other part of the day doing yardwork. Lovely.
Well, today was supposed to be an exciting, happy day. Theoretically, the electrician was supposed to come out and install a subpanel in the new area of the workshop. As it stands now, Amy and I share one 20A circuit and use another 15A circuit for the lights and dust collector. Needless to say, there are extention cords every where.
I guess I should correct my second sentence...the electrician did indeed show up. However, he quoted me a price of over $1000 to install the subpanel. The kicker of the whole situation was that the subpanel would only be about 12 feet from the main panel. Now, I'm no electrician, nor am I an accountant, but I can do the math pretty well:
New subpanel: $75
100A circuit breaker: $40
25' of 2 gauge wire: $40
So far, we have a whopping $155 in materials so far. I'll be reasonable and call it an even $200, just for the sake of simplicity. Which means, assuming that my math is correct, that I was being quoted $800 in labor! Uh, I don't think so. Methinks its time to call around some more or do it myself. I'm not big on electrocuting myself, but I'm not big on shelling out $1000 for a job that small.
Just a quick post tonight. Been working on getting the new space cleaned up and ready to go and finally took the time to put together the new band saw. Its a Grizzly G0555, 14" bandsaw...and boy, is that thing friggin' heavy! It was shipped truck freight, and it was all I could do to get the damn thing out of the truck when I got home.
At any rate, after sitting in the new part of the workshop for over a week now, I finally decided that I was tired of tripping over it and moving it to get things in order, so I broke down and put it together. Here it is, in all it's glory...

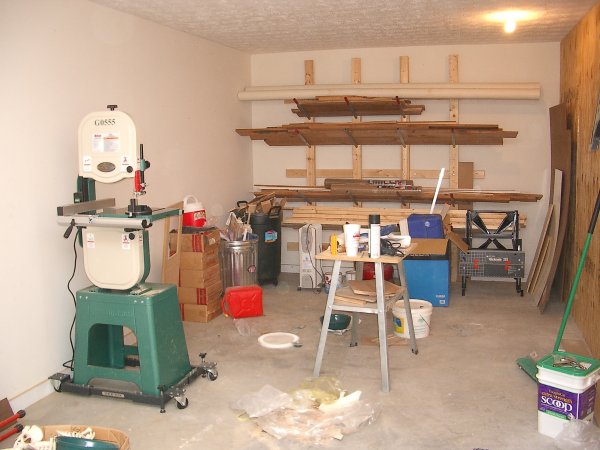
And, for those interested, the workshop expansion is coming along nicely. I got the wood rack moved and put up and have 98% of the non-shop related junk out of the room. Here's a shot of the mess for those of you keeping score at home.
A little history is needed here...allow me to reflect for a moment...and yes, expect a long-winded post.
I got interested in woodworking more by accident than anything else. Amy and I decided a couple of years ago to put down hardwood floors in our dining room and living room. At the time, the only power tool we owned was a drill and a el-cheapo circular saw. But as the dining room was fairly square...well, as square as any room in our house is anyway...I didn't need to make lots of complicated cuts. But as we moved to the living room and hallway areas, we rapidly found out that a circular saw isn't exactly the best tool for ripping pieces of hardwood flooring. There the disease began to set in...
First it was a jigsaw. Then it was a compound mitre saw. Then it was a bench top table saw. The final blow came at Christmas time when Amy's mother bought me a book of simple home improvement ideas, the most interesting of which was a workbench and a shelving unit. At that point I decided that I needed an area of my own in which to ruin wood.
Luckily, we have a small room behind our garage that worked well for this purpose. It's about nine feet wide and twenty feet long, which was fine for my little shop. I cleaned it up and started building shelves and a bench.
I soon realized after borrowing a friend's contractor's table saw that my little Ryobi bench top saw wasn't going to get me very far at all. It worked fine for cutting up flooring, but I knew it wasn't going to get me very far. To make a long story a bit shorter, lets just say that the additions of a portable planer, a 6" jointer, a router table, a contractors saw and the workbench made things a little too cozy. When Amy took up wood carving, well, things got a bit more cramped. And when Amy convinced me, by brute force of course, that we needed a band saw, only for her wood carving interests, mind you...I will never have any need for a band saw...we realized that, well, our hobby had outgrown our space.
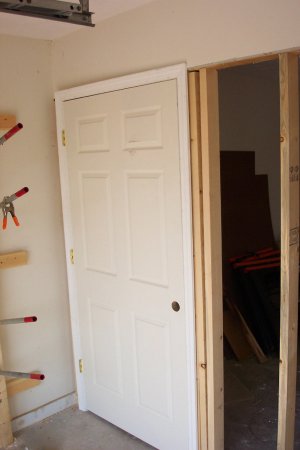
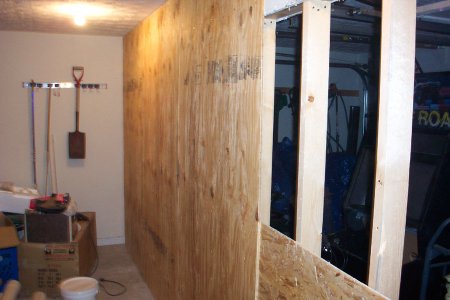
We decided it was time to bite the bullet and enclose half of our garage to expand that workshop. So, my brother, Mike and I made a couple of trips to our local Borg to requisition the needed supplies and commenced the building.
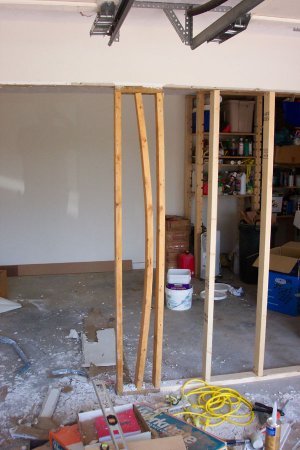
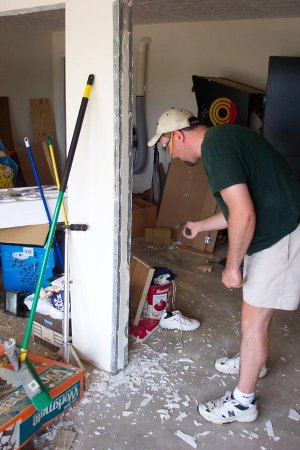
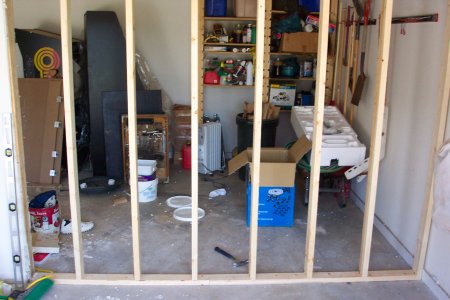
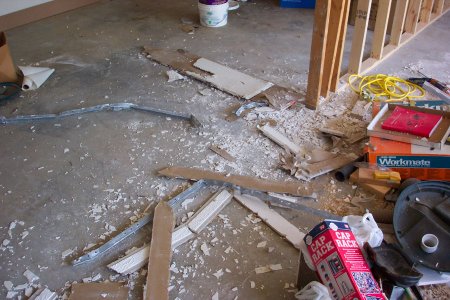
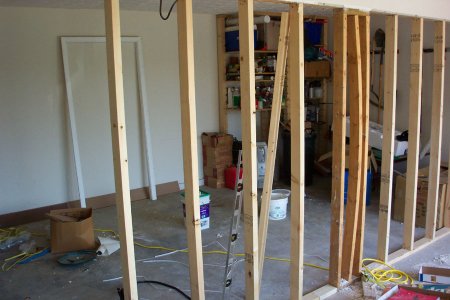
Mike and I worked until about midnight on this stupid wall, but we got it up and managed not to nail any extremities to the wall with the framing nailer. The pictures below depict the carnage and rebuilding.
One small note, however...if you look at the first picture, you'll see a rather interesting stud. When Mike and I tore down the sheetrock from the center support post (second picture), we were greeted by this stud. It isn't nailed in place...at least we can't see any evidence of it being nailed in place. The only thing we can figure is that it was warped like that when it was stuck in place...quite odd. We stared at it for fifteen minutes trying to figure out what it was for.
Oh, one other thing...yes, we covered the walls with plywood. No, it isn't pretty, but I hate trying to find studs when I'm attaching stuff to the wall. The plywood should take care of that problem...and no nasty sheetrock dust to clean up.
 |  |  |
 |  |
 |  |
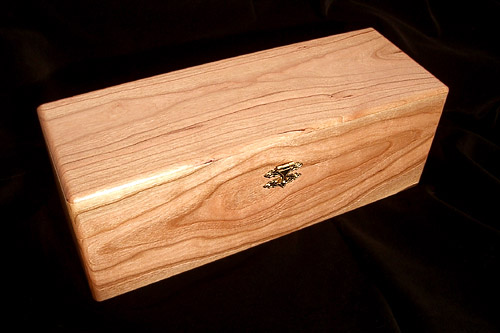
As I was watching Amy carve one day, I noticed that her collection of burrs was rapidly outgrowing the tray thingy she was keeping them in. Two things came to mind...first, I was really glad that those weren't router bits...after all, you need a router for every bit, right? After I got done fantasizing about being buried up to my elbows in routers, I decided it was time to make a box.
I've seen some really beautiful wooden boxes of various shapes and sizes, some with inlays and all sorts of neat stuff. Personally, I just don't think I'm quite ready for that just yet. So, in an effort to retain what sanity I have left, I chose to keep the design simple.
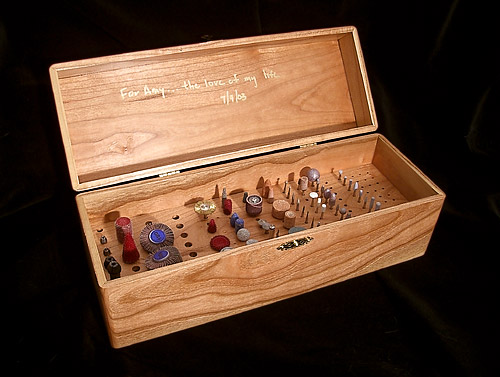
The box is made up of 1/4" cherry with mitred corners. There are two 1/8" dadoes, one to hold the bottom and one to hold the piece that holds the bits, both of which float in the dadoes (see, Norm did teach me something!). I cut a 1/8"x1/4" rabbet in the top and attached it with glue. All the corners are rounded over to give the box a more finished look. This box is also finished with semi-gloss Arm-R-Seal.
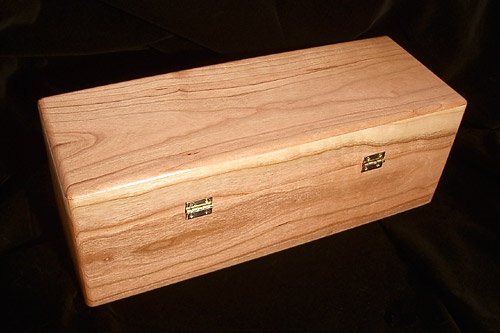
Personally, I'm pretty pleased with the way it turned out. I was actually rather nervous about putting the hinges on the box as I was afraid to ruin what I had already accomplished. But as you can see from the pictures, the hinges went in without much of a hitch and the box is already being put to really good use.
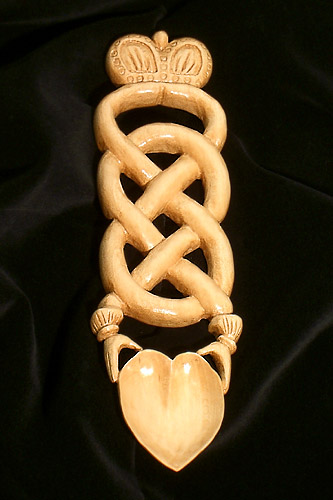
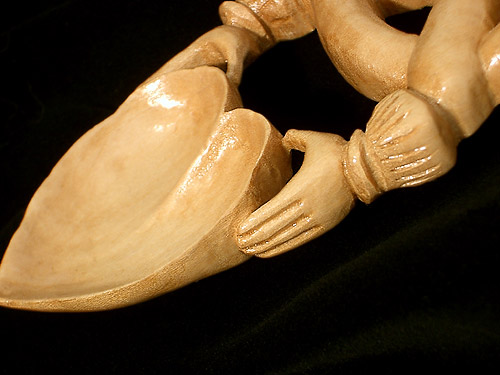
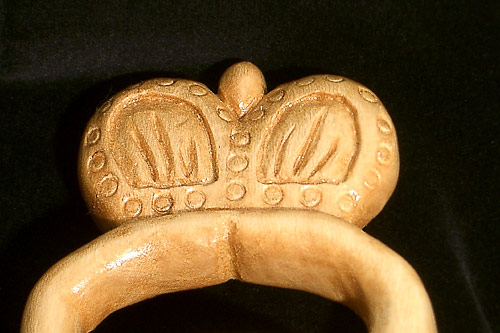
Hi there, Amy here. I'm an artist at heart, having always done traditional paintings, sketches and clay sculptures. When Rob decided to get into woodworking I struggled to find my niche. Sure, I had built tree-houses and wooden go-carts as a kid but as a thirty-something adult now that wasn't going to fly. (especially with no kids to speak of) Desperate to find a hobby we could share and do together I tried power carving...
My first official project is this Celtic Love Spoon. It was carved with both a Foredom Power Carver and a traditional carving knife. It's done in Basswood and finished with Arm-R-Seal. I'm extremely proud of this piece, especially since it's my first one. I'm fascinated with the Celtic knot designs and I plan to do many more of these in the future.
 |  |
 | |
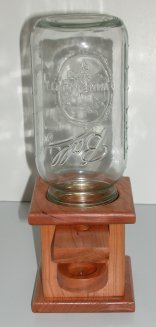
Here is the first official, non-shop related completed project. It is a candy dispenser I made for my mother as a Mother's Day present.
The dispenser is made from cherry and finished with Arm-R-Seal, which is a mixture of tung oil and urethane which was wiped on. The mason jar, which holds the candy, is held in place by its lid, which is attached to the body of the dispenser with a couple of brads and some CA glue.
In retrospect, I think the jar itself is too large for the body, but as I made the boneheaded mistake of cutting my stock before I bought and measured the mason jars that I had purchased, I found that the jars I bought had a smaller opening than the jars that were used to create the drawings. The only other jars that I could find that had an opening of the size that I had created were these huge two-quart jars.

Just wanted to welcome everyone to the new website. We're still in the "figuring out how best to put the site together" mode, so bear with us. We have plenty of content built up, so check back often.