Is better than a good day at work. But a great day in the shop...well, that's even more better...
I took a much needed extended weekend, which unfortunately ends at 7:30 tomorrow morning. The sole aim, with the exception of setting up the Unisaw, was to work on Mike and Christy's crib. Yesterday and today I managed to achieve that goal. And all of you reading this should feel special as I only stopped for the night so that I would have time to write this so you would have something to read :)
The crib is starting to come together nicely. So far I have the legs done, the top rails done and the bottom rails almost done. Read on for pics...
I cut the mortises in the legs Sunday, which, never having made mortises before, was rather nerve wracking. They came out pretty well, if I do say so myself. I spent most of my shop time yesterday milling up the rails and drilling the needed holes in the legs. Today was spent making tenons in the rails (another new one on me) and mortising out the top rails for the decorative inserts to be added later. I know it may not sound like a heap of accomplishments, but given my...umm...attention to detail, (OK, I'll say it, I'm anal!) the setup for the different cuts took a while. I made sure to measure at least three times, tested my cuts on scrap, etc. etc. What it really boils down to is a lot of things I did today I had never done before so I wanted to take my time to ensure that I didn't screw up...after all, hard maple isn't the cheapest wood out there and having to recut parts at this point would suck.
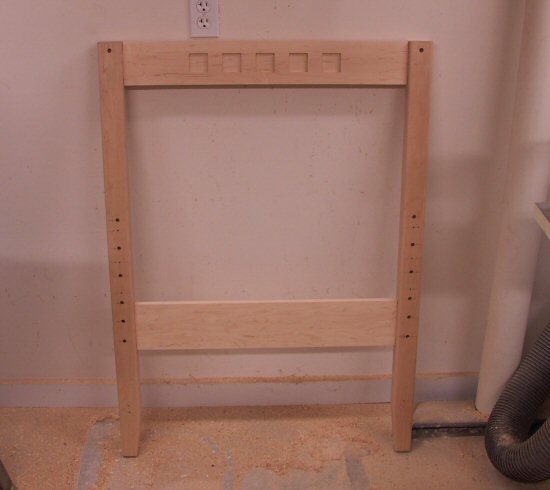
At any rate, here's a pic of the dry fit of two legs with their rails. So far so good...still have to tweak the tenons a bit, but its coming along nicely.
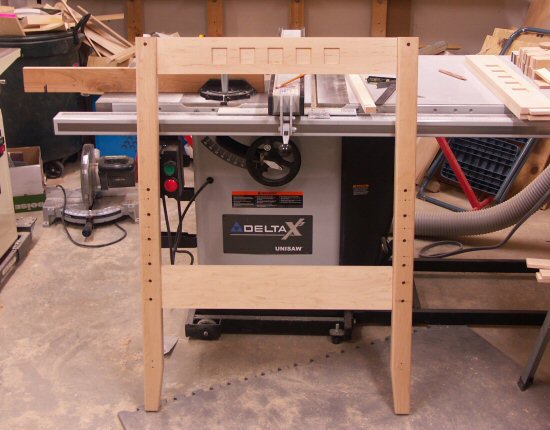
I couldn't decide which picture I liked better, so here's another...sans heap of mess in the background:
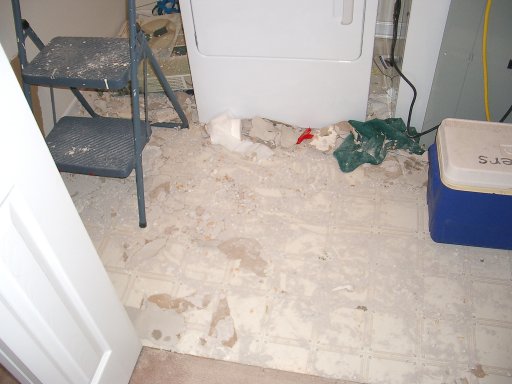
Well, I woke up this morning a bit sorer than normal. The shop woke up a bit messier than normal, to say the least.
Last night while we were wiring up the shop, we were on a mission. A mission not to be deterred by the Martha Stewart types of the world. We were wiring, dammit, doing manly things, cleanliness be damned. As a result, this morning the shop looked as if the twister that struck when Mike and I built the new wall had struck again.
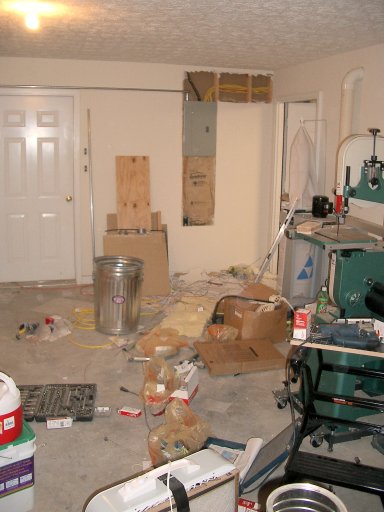
After having my morning iced tea and staring at the devastation that we had caused the previous night, I decided that the mess wasn't going to go away on its own, no matter how long I stared at it. Here's what I was staring at, just to give you an idea...
 | 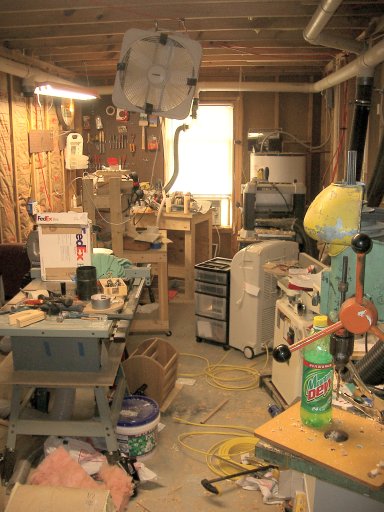 |
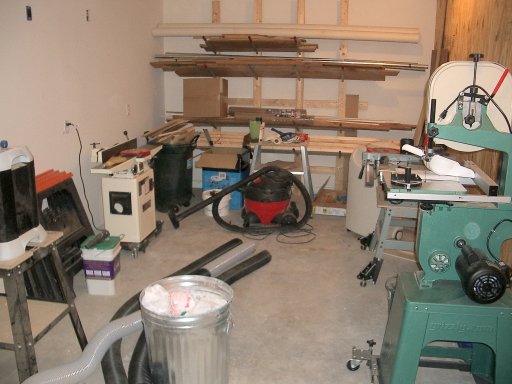
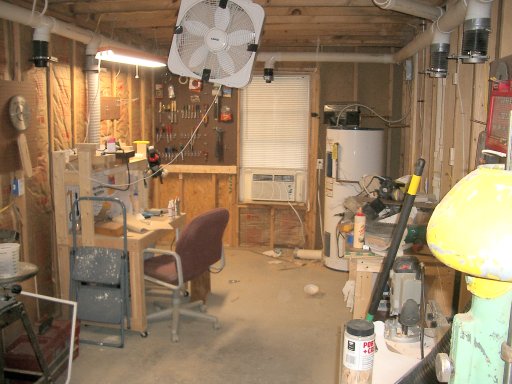
I'll spare you the longwinded gory details, but after working all day, here's how it all ended up. It is by no means finished, but by the time I decided to call it a day I had reached my limit for cleaning for one day. Actually, I probably went over my limit...
|
|
|
|
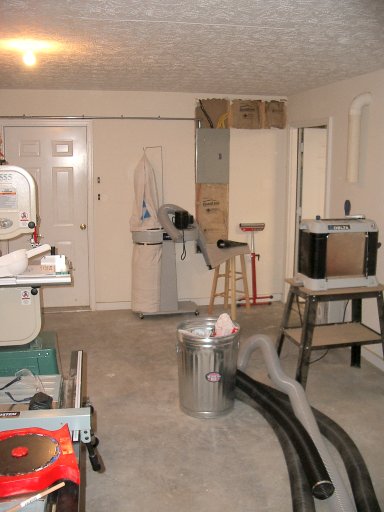
At least now I can see the floor...still can't see the top of my workbench, but all in good time. But, as you can see, most of the big tools have been moved to their new homes...all wired up and ready to ruin some wood.
The one happy note of the day is that the air conditioner that had previously stopped working magically started functioning again this afternoon. Why or how I can not explain, but I'm sure not complaining.
Saturday, August 2nd started out as a quiet day in the Atlanta suburbs...but that was to change. You see, August 2nd was the day slated to be the day of the great wiring party...mayhem and havoc were to be the order of the day.
Enough of the melodramitic crap, lets get on with it. Just a warning, this is going to be a long post with lots of pictures. And lots of dead sheetrock...
Tom and David arrived about 10am...I don't think even they were ready for what we were to embark on.
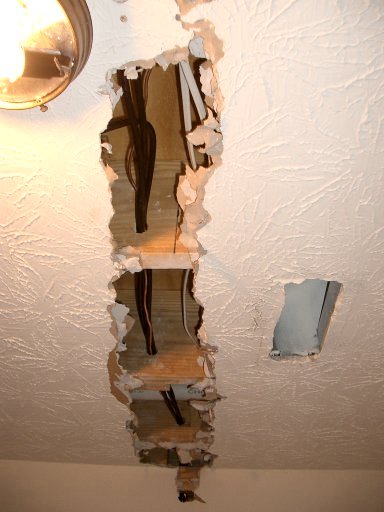
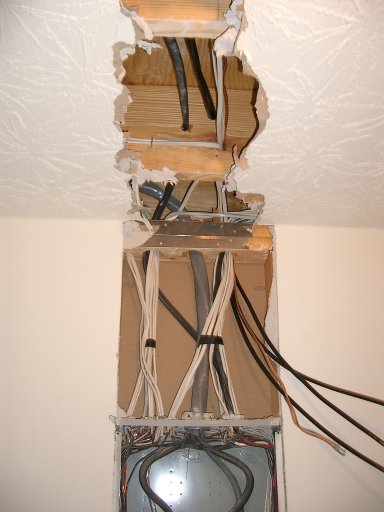
First order of the day was to pull three 2 gauge wires from our laundry room out to the garage...a distance of about eight feet, not counting the distance from the ceiling to the boxes. Just as a frame of reference, keep in mind that 2 gauge wire is about 3/8" in diameter and is made up of a bunch of strands of solid copper. A foot of it weights about a pound, more or less...its heavy...and stiff...and a royal pain in the ass to pull around a corner.
In order to get these wires from point A to point B, we needed to do some demolition...a lot of sheetrock had to be sacrificed and a mess had to be made.
|
|
|
|
|
|
|
|
|
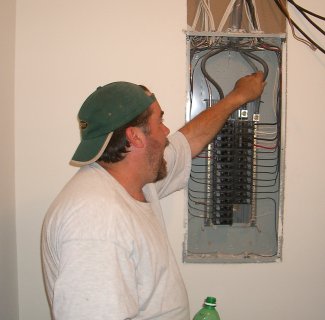
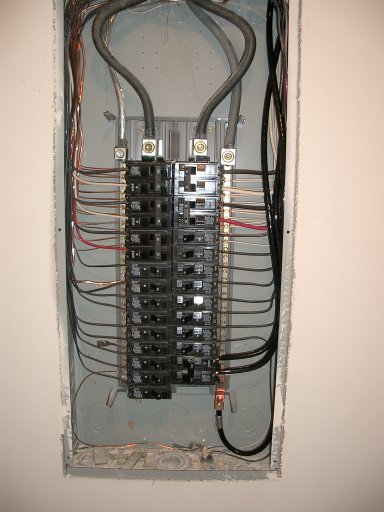
After breaking a few drill bits, we finally got the holes drilled through the joists and the wires run. Next up was the daunting task of wiring up the 100A breaker that would run the subpanel in the shop. Below you can see David starting the job, only to find out that those big wires carry a bit of juice! (Actually, folks, he was just kidding...I assure you that he's as not right as he was when he arrived) Tom ended up actually wiring up the breaker and all the other stuff in the box...seems like he's done this stuff before.
|
|
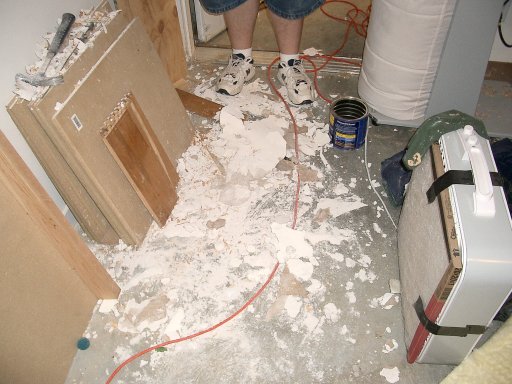
Next up was the fun part...running Romex and wiring outlets. While Tom was wiring up the main box, David and I started running conduit down the new wall. We couldn't run behind the wall between the studs, so the only way to do it and have it as close to being to code as if an electrician had done it was with conduit. We wired two circuits down that wall, with a total of four sets of outlets. Tom showed me how to tie the wires into the breakers and, I'm pleased to say, I'm still here, the house is still here, and the outlets work.
After the "new wall" outlets were completed, we commenced to drilling more holes and pulling more wire. 12/2 Romex to be exact. We ran eight more 110V circuits, and one 220V circuit (with 10/3 Romex) for the future addition of an air cleaner. It took the three of us the better part of two hours just to get the wire run through the joists and to the subpanel.
Now that the Romex was run, we decided to subdivide and conquer. Being the "apprentice", so to speak, I spent most of my time stapling the Romex to the joists and studs and pulling it through the outlet boxes. David would come behind me and wire up the outlets while Tom wired them into the breaker box. It all went pretty quickly, and I think we were all rather glad when we fired up all the breakers and they all tested out OK.
It really sucks that I don't have more pictures of the endeavor, but I think we were all trying to get done rather than play photo-journalist. Besides, you've all seen electrical outlets before, I'm sure.
All in all, it took us until about 11:30pm to complete the job. I'm sure Tom and David will think twice before volunteering to help me with a project again, but I am most indebted to them for all of their help.
Well, after the debacle with the electrician, we decided to take matters into our own hands.
Anyone want to take a gander at this pile and guess what's in store for this weekend?
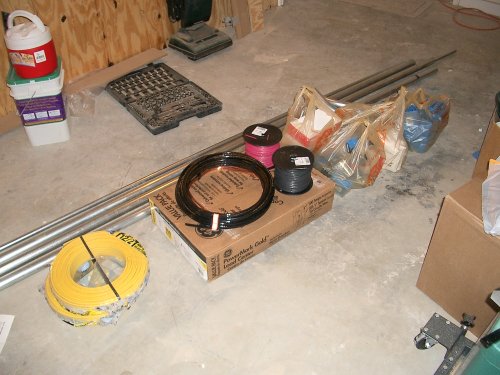
A couple of my friends from work will be joining me in what I hope will not turn into an electrocution party. It should be interesting, to say the least.
It should be noted, however, that with all of the materials shown here, I now have a little over $410 into the project. I forgot a couple of small items, but I don't expect the total tab will get much over $500...a little less than half of what I was quoted by the electrician just to run the subpanel! Granted, that doesn't take into account the food and beverages required for everyone...
A little history is needed here...allow me to reflect for a moment...and yes, expect a long-winded post.
I got interested in woodworking more by accident than anything else. Amy and I decided a couple of years ago to put down hardwood floors in our dining room and living room. At the time, the only power tool we owned was a drill and a el-cheapo circular saw. But as the dining room was fairly square...well, as square as any room in our house is anyway...I didn't need to make lots of complicated cuts. But as we moved to the living room and hallway areas, we rapidly found out that a circular saw isn't exactly the best tool for ripping pieces of hardwood flooring. There the disease began to set in...
First it was a jigsaw. Then it was a compound mitre saw. Then it was a bench top table saw. The final blow came at Christmas time when Amy's mother bought me a book of simple home improvement ideas, the most interesting of which was a workbench and a shelving unit. At that point I decided that I needed an area of my own in which to ruin wood.
Luckily, we have a small room behind our garage that worked well for this purpose. It's about nine feet wide and twenty feet long, which was fine for my little shop. I cleaned it up and started building shelves and a bench.
I soon realized after borrowing a friend's contractor's table saw that my little Ryobi bench top saw wasn't going to get me very far at all. It worked fine for cutting up flooring, but I knew it wasn't going to get me very far. To make a long story a bit shorter, lets just say that the additions of a portable planer, a 6" jointer, a router table, a contractors saw and the workbench made things a little too cozy. When Amy took up wood carving, well, things got a bit more cramped. And when Amy convinced me, by brute force of course, that we needed a band saw, only for her wood carving interests, mind you...I will never have any need for a band saw...we realized that, well, our hobby had outgrown our space.
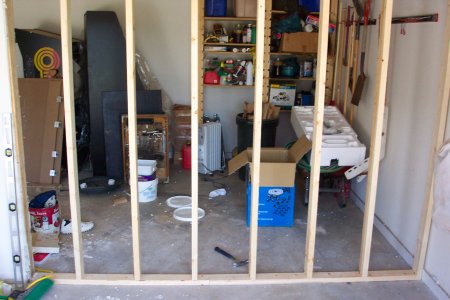
We decided it was time to bite the bullet and enclose half of our garage to expand that workshop. So, my brother, Mike and I made a couple of trips to our local Borg to requisition the needed supplies and commenced the building.
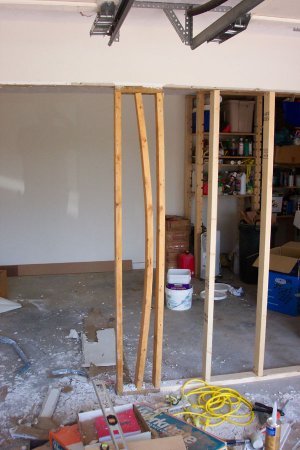
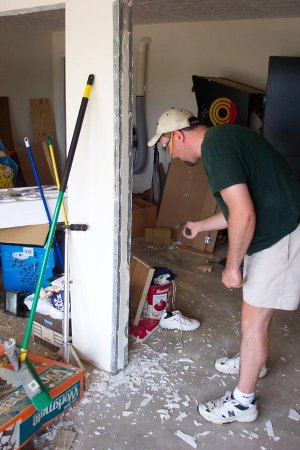
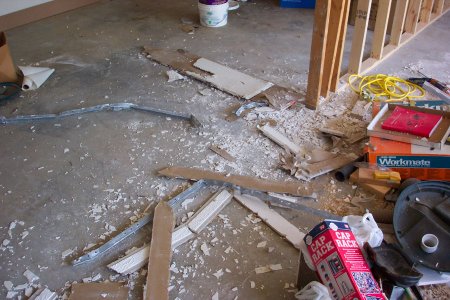
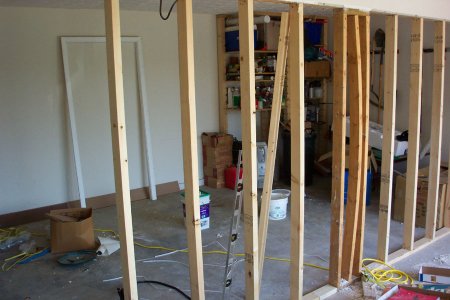
Mike and I worked until about midnight on this stupid wall, but we got it up and managed not to nail any extremities to the wall with the framing nailer. The pictures below depict the carnage and rebuilding.
One small note, however...if you look at the first picture, you'll see a rather interesting stud. When Mike and I tore down the sheetrock from the center support post (second picture), we were greeted by this stud. It isn't nailed in place...at least we can't see any evidence of it being nailed in place. The only thing we can figure is that it was warped like that when it was stuck in place...quite odd. We stared at it for fifteen minutes trying to figure out what it was for.
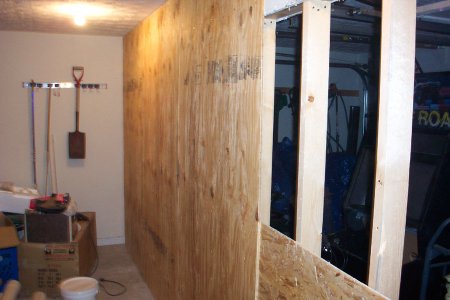
Oh, one other thing...yes, we covered the walls with plywood. No, it isn't pretty, but I hate trying to find studs when I'm attaching stuff to the wall. The plywood should take care of that problem...and no nasty sheetrock dust to clean up.
 |  |  |
 |  |
 |  |
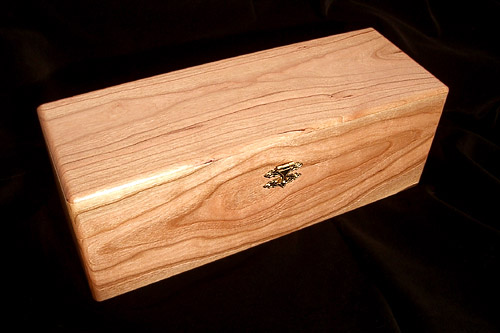
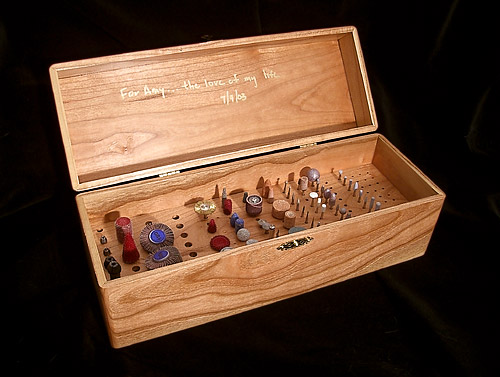
As I was watching Amy carve one day, I noticed that her collection of burrs was rapidly outgrowing the tray thingy she was keeping them in. Two things came to mind...first, I was really glad that those weren't router bits...after all, you need a router for every bit, right? After I got done fantasizing about being buried up to my elbows in routers, I decided it was time to make a box.
I've seen some really beautiful wooden boxes of various shapes and sizes, some with inlays and all sorts of neat stuff. Personally, I just don't think I'm quite ready for that just yet. So, in an effort to retain what sanity I have left, I chose to keep the design simple.
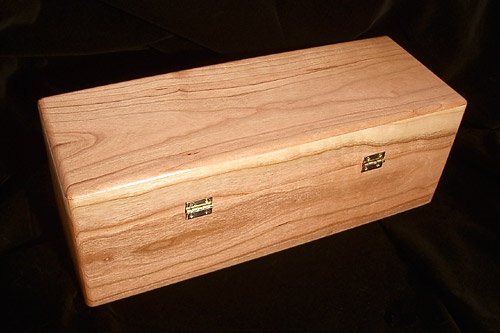
The box is made up of 1/4" cherry with mitred corners. There are two 1/8" dadoes, one to hold the bottom and one to hold the piece that holds the bits, both of which float in the dadoes (see, Norm did teach me something!). I cut a 1/8"x1/4" rabbet in the top and attached it with glue. All the corners are rounded over to give the box a more finished look. This box is also finished with semi-gloss Arm-R-Seal.
Personally, I'm pretty pleased with the way it turned out. I was actually rather nervous about putting the hinges on the box as I was afraid to ruin what I had already accomplished. But as you can see from the pictures, the hinges went in without much of a hitch and the box is already being put to really good use.